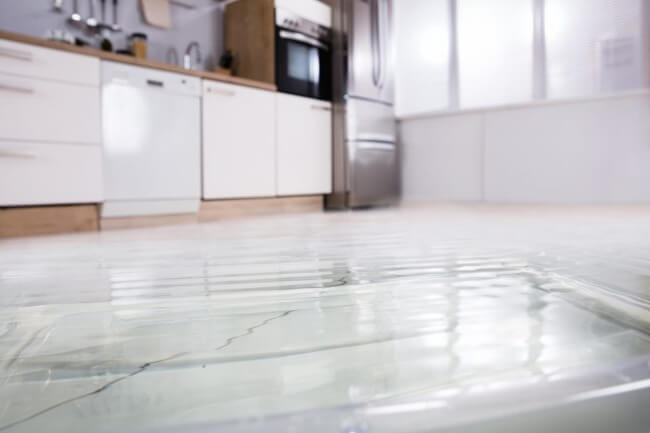
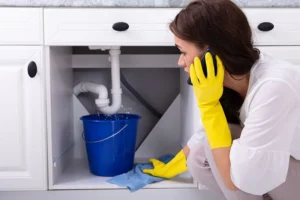
Is the puddle of water that accumulates under your dishwasher after each washing cycle perturbing you? Or have you dismissed it as a minor glitch?
Let’s face it; a dishwasher is a lifesaver! Without it, we’d be scrubbing dishes in the sink for hours. Imagine the horror if it leaves you with more work instead? That’s exactly what happens when the dishwasher starts leaking.
A leaking dishwasher will overflow or will have water pooling around it, and you’ll have to be ready with a mop to wipe it. To make matters complicated, a leak in the unit can be a minor problem that you can quickly fix or some major underlying issue.
Now, it’s essential to get to the root of the problem and hire professional help if needed. In this guide, we’re going to tell you all about diagnosing a leaking dishwasher.
So, without further ado, let’s get right into it!
How To Diagnose A Leaking Dishwasher?
More often than not, a dishwasher is malfunctioning because of a minor issue that you can deal with yourself. Below are the eight most common problems that cause dishwasher leakage.
1. Inspect The Gaskets
The gasket is the rubber seal that runs around the perimeter of the dishwasher door. If you find water leaking from the edges of the door or accumulating under it, that’s probably because of a malfunctioning gasket.
When the gasket is new, it works efficiently to keep the water and soap inside. However, over time, it endures wear and tear, and the rubber seal gets brittle. Besides, food particles might get stuck in it and prevent the door from latching correctly. Sometimes, the seal might get misaligned and you need to put it back in place.
To check whether the gasket is at fault, look for prominent tears. If there are no visual cracks, run your hand along the seal to check for cracks or food pieces stuck on it.
Alternatively, you may use the newspaper technique to know if the gasket’s the culprit. For this, you insert a newspaper along the edges of the door and close it. Then try to pull the paper out. If it comes out effortlessly, then the gasket is faulty and needs replacement.
The good news is that replacing a gasket is relatively easy. You do not need any professional help for it. Buy a new gasket and soak it in warm water or run a hair dryer along its edges. Once it becomes sufficiently flexible, disconnect the unit and install it.
Remember to tighten the screws of the door while you’re at it.
2. Check For Damaged Hoses
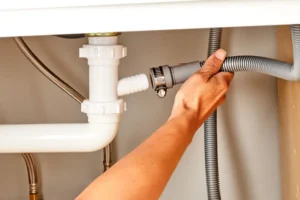
A dishwasher has a lot of hoses attached to it. Over time, one or more of these hoses can get damaged or become loose. As a result, the unit will start leaking water onto the floor. To diagnose loose pipes, you’ll need to remove the kick plate at the bottom of the washer.

Once removed, you’ll have easy access to the pipes and can check for cracks or loose connections. Carefully inspect the clamps that hold the hose to the primary pump. Use a flashlight and run your hand along the pipes, looking for signs of leakage.
If any of the circulating pipes do not show signs of damage and the clamps are well in place, check the drainage pipe at the back of the unit. To inspect the drainage hose, you’ll have to pull out the unit and loosen a few screws at the back.
Immediately replace the damaged hose and if it’s something you can’t manage on your own, consider hiring a trained technician for help. Tighten all clamps and make sure the circulating and drainage pipes are in place.
3. Inspect The Inlet Valve
At the base of the unit, you’ve got the inlet water valve that feeds water from your main pipe. If there is a defect in the valve, there is a high probability of water overflowing and leaking out, this may be the cause of your leaking dishwasher.
So how does one find the defect in the inlet valve? Well, there is more than one way to do it. The simplest would be to switch on the dishwasher and open the door halfway through the cycle. If water continues to run even after you open the door, it’s because of a defective valve.
Remember, a failing valve will require immediate replacement since it connects to many electrical wires. So, shut off the leaking dishwasher and don’t use it until it’s in proper working condition.
Repairing a leaky inlet valve might not be everyone’s cup of tea, so we strongly suggest hiring a professional if you’re not 100% confident about DIY-ing this.
4. Clogged Filter
Do you hear weird gurgling sounds from the dishwasher followed by water accumulating at its bottom? Then chances are the issue at hand is a clogged filter. When you don’t frequently clean the filter, the buildup of food particles and mineral deposits gets trapped and doesn’t allow water to flow smoothly.
A clogged filter prevents water in the unit from draining out. And when the appliance takes in more water, the excess flows out onto the floor.
5. Faulty Dishwasher Tub
Like every other electrical appliance, a dishwasher is not immune to the ravages of time. With frequent wear and tear, you might notice holes forming in the tub or corrosion on the base because of mineral buildup. As a result, water seeps through, and you’ll notice it gathering at the bottom of the unit.
Repairing the tub is easy. However, if it’s an old model, the chances are that it’s damaged beyond repair. In such cases, replacing the dishwasher might be a more cost-effective option.
6. Using The Wrong Detergent
Dishwashers have specialised detergents. While you might dismiss the need for a separate dishwasher detergent, we’d like to warn you that ordinary soap produces a lot of foam. Consequently, the solution can bubble up and force water and soap to leak out of the tub.
You can avoid this problem easily by using soaps meant only for dishwashers.
7. Misaligned Dishwasher
If you do not place the dishwasher on a level surface, the chances of water accumulating under it are high. To avoid such cases, you can install shims under the washer to put it on a levelled surface.
If it is misaligned, you might experience drainage issues where water stagnates instead of draining properly.
While we’re talking of misalignment, sometimes the door of the unit doesn’t close properly. This is because the screws on it come loose and you’ll notice leaking around the edges. So check these screws from time to time.
8. Malfunctioning Spray Arm
Most dishwasher models come with a spray arm that sprays water over the dishes to ensure thorough cleaning. With time, the spray arm is likely to develop cracks or become dislodged if the appliance is overloaded. As a result, it will spray water at the base of the unit instead of at the dishes.
For inspecting a damaged spray arm, you will have to open the appliance door, remove the lower rack and check it for cracks and damages. While you’re at it, also inspect the arm for blocked holes. Clean the clogged holes, but in case of significant damage, consider replacing it.
A new spray arm is relatively easy to install and absolutely within your DIY capabilities.
When To Contact A Plumber?
If you’ve tried all the things mentioned in this guide and still experience the same issue, the problem at hand might be much more significant. So, we recommend contacting a professional who can offer proper guidance and provide a permanent solution.
Remember to tell the plumber all the details and specific instances where you notice the leakage. This will make the diagnosis of the problem easier for them.
Final Words
With that, we come to the end of our guide. A leaking dishwasher can be quite an annoyance and a potential hazard.
Not just that, water pooling on the tiles can hinder its efficiency and reduce its longevity in the long-run. Not to forget, it also makes the floor susceptible to the growth of mould and mildew.
Scrutinising the dishwasher for leaks is of the utmost importance. To avoid a malfunctioning appliance, we recommend regular servicing and check-ups.
Also, sometimes dishwashers break down because of the heavy load and years of use. In such cases, it’s better to replace the unit rather than incurring the costs of repairing it.
With that, we will leave you to fix your leaky dishwasher and then let it do the dishes.

