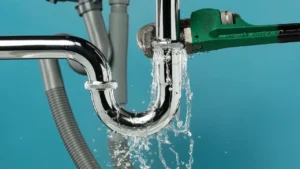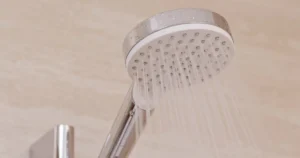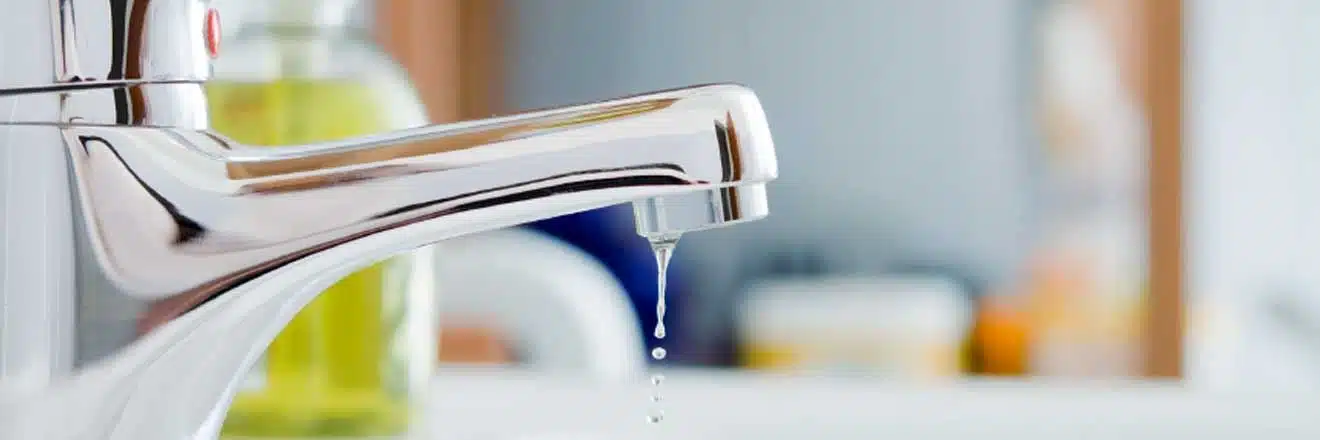
Got a dripping tap that’s driving you up the wall? Every household will face this issue at some point. This guide provides easy steps on how to fix a leaking tap, saving water and your sanity along the way.
Let’s get started!
Reasons for a Leaking Tap
A leaking tap can happen due to various reasons, such as worn-out or damaged washers, loose or damaged components, high water pressure, corrosion and mineral buildup, improper installation, cracked or damaged pipes, and excessive wear and tear.
These issues can cause annoying leaks that waste water and increase your bills.
Worn-out or damaged washers
Washers inside taps stop water from leaking out. Over time, they can wear out or get damaged. This is a common cause of tap leaks. You might need to replace these washers to fix the leak.
Using the right tools makes this job easier. First, turning off the water supply is key. Then, taking apart the tap lets you see if the washer needs changing. If it does, fitting a new one helps stop the leak.
Loose or damaged components
Taps can start leaking because parts inside them become loose or get damaged. This might happen if the tap gets used a lot. It can also be due to people turning taps too hard when they use them.
Fixing these issues usually means you need to tighten things up or replace the parts that are broken. It’s like fixing a bike – sometimes, you just need to tighten a screw or change a tyre.
Next, we look at what happens when water pressure is too high and why that’s a problem for taps.
High water pressure
High water pressure can be rough on your taps. It makes them work harder than they should, leading to leaks. Think of it as pushing too hard on a door handle; eventually, it might break or not work right.
Your home’s plumbing feels the same pressure. If the pressure’s too high, parts inside the tap wear out faster.
Water should flow smoothly, not burst out like a fire hose. If you notice water shooting out quickly or banging noises in pipes, these are signs of high pressure causing trouble. Next, let’s talk about corrosion and mineral buildup and how they also lead to leaking taps.
Corrosion and mineral buildup
After dealing with high water pressure, it’s time to tackle another common reason taps leak: corrosion and mineral buildup. Over time, water leaves behind minerals that stick to the inside of your pipes and tap.
These hard layers can block water flow or damage parts, leading to leaks. Certain areas with “hard” water have more of these minerals.
To fix this, you might need to clean or replace affected components. Look for signs like green stains (from copper pipes) or white buildups (from calcium). Simple cleaning might help minor cases, but serious buildup often requires new parts.
Keep an eye on your tap’s performance; regular checks can catch issues early.
Improper installation
Moving from the issues of corrosion and mineral buildup, it’s also crucial to talk about another common reason taps leak: improper installation. Sometimes taps are not put in right because people might not tighten them enough or they could miss a part.
This can cause water to escape where it shouldn’t. It seems simple, yet many leaks start this way.
Fixing this isn’t hard but needs care. You have to take the tap apart and check everything is there and put together tight. If something looks wrong or missing, that might be your problem.
Fixing it can stop the leak and save water and money over time.
Cracked or damaged pipes
Just like improper installation can cause trouble, so too can cracked or damaged pipes make a tap leak. Pipes might crack due to cold weather or simply get old and wear out. This damage lets water escape before it reaches the tap.
Fixing this is not always easy. You might need to find the broken part of the pipe. Sometimes, you will see wet spots on walls or floors near the pipe, other times you have to listen for water hissing when taps are off.
Once found, fixing these pipes often requires cutting out the damaged section and replacing it with new piping, making sure everything is tight and sealed properly.
Excessive wear and tear
Moving on from cracked or damaged pipes, taps also suffer from excessive wear and tear. This happens when a tap gets old and is used a lot. Over time, the parts inside the tap can wear out.
This causes the tap to leak. Every twist, turn, and constant use adds more strain. Think of it like an old car; after many years and lots of miles, it needs more repairs.
Fixing these leaks early helps prevent bigger problems later. If ignored, the damage can get worse and might cost a lot to fix. So, watching for signs of wear is key to keeping taps in good shape.
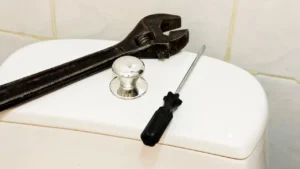
Tools Needed to Fix a Leaking Tap
To fix a leaking tap, you’ll need common household tools like a screwdriver, pliers, and an allen key. Don’t forget to read the full guide for more details.
Screwdriver
In order to fix a leaky tap it is necessary to use an screwdriver. This tool can be used to take out the screws that hold the tap in place and can be used to remove the handle. A flat-head screwdriver or Phillips screwdriver is commonly employed to accomplish this in accordance with the type of screws that are in the tap.
Be aware that using the correct dimensions and types of screwdriver is vital because it will ensure that you don’t cause damage to the screws or any of the surrounding areas. It is recommended to keep both kinds on hand since certain taps require different screwdrivers to fit the components.
Pliers
Pliers are useful tools for fixing a tap that is leaking. They assist in tightening and loosening bolts, nuts, and other parts. It is crucial to utilize flexible slip-joints that are able to hold various sizes of pipes safely.
This ensures you have the right grip to disassemble the tap without causing damage.
When working with pliers, ensure they fit snugly around the pipe or nut to avoid slipping and causing additional issues. Tighten or loosen components carefully to prevent any further damage.
Remember not to over-tighten as this could lead to breakage or crushing of delicate parts. Additionally, using pliers with insulated handles is safer when working on plumbing near electrical connections.
Allen key
A allen key also referred to as a hex key, or the hex wrench is a tiny handheld tool that is used to drive screws and bolts using hexagonal socket. It is a must-have tool to fix leaky taps because it allows users to quickly take off from the screw that holds the handle in the correct position.
The wide range of sizes available can be used to suit various tap types, making sure that you get the perfect fitting for your specific repair requirements.
If you refer to it as an allen wrench or Hex wrench, the tool you have on hand can make disassembling your tap much simpler in replacing washers and other parts contributing for the leak.
Its small size and variety of adapters ensures it is able to be used with a variety of taps without the need for numerous tools.
Spanner or basin wrench
To fix a leaking tap, you’ll need either a spanner or a basin wrench. A spanner is helpful for accessing hard-to-reach nuts and bolts, while a basin wrench comes in handy for tightening or loosening faucet fittings in cramped spaces.
Both tools are essential for dismantling the tap and carrying out repairs effectively.
Remember to have these tools ready before starting your repair work. Now let’s delve into the step-by-step guide to fixing that pesky leaking tap!
Washer assortment
When it comes to fixing a leaking tap, having the right tools is crucial. You’ll need a washer assortment, which includes various sizes of washers to fit different taps. This ensures that you have the correct replacement parts on hand when dismantling your tap for repairs.
By having a washer assortment, you can avoid delays and frustration in the middle of your repair process. It allows you to promptly replace worn-out or damaged washers without needing to make additional trips to the hardware store.
So, ensure you have this essential tool in your kit before tackling your leaking tap issue.
Plumbers tape
The plumbers’ tape also referred to by the name of Teflon tape also known as thread sealing tape is a vital instrument for fixing taps that leak. It’s a white, thin tape that wraps around threaded end of pipes and fittings to form an airtight seal.
This can prevent leaks in the joints where pipes join or with fixtures such as faucets. When using plumbers tape, it is essential that you wrap the tape around threads of pipes in a clockwise fashion so that it won’t fall apart when you screw on the fitting that connects them.
Be aware that using plumbers tape will significantly lower the chance of leaks in the future.
Plumbers tape is a cost-effective solution to stop leaks in plumbing fixtures. It’s accessible at hardware stores as well as online retailers. Remember that if employed correctly, this basic but effective tool will save your plumbing from damages to your pipes and expensive repairs in the future by providing tight seals to the pipework connections.
O-ring grease or plumber’s grease
Before assembling the tap and reassemble it, apply a thin coating of plumber’s grease on the O-rings. This will create an impermeable seal that will prevent any leaks. Be careful not to apply too much because excessive grease can draw in dirt and obstructions later on.
Keep in mind that using excessive or insufficient fluid can lead to problems in the future. Apply a light and even coating to get the best results.
Step-by-Step Guide to Fixing a Leaking Tap
To fix a leaking tap, start by turning off the water supply. Then, disassemble the tap and inspect or replace washers or cartridges as needed. After that, clean any debris, reassemble the tap, and turn the water supply back on.
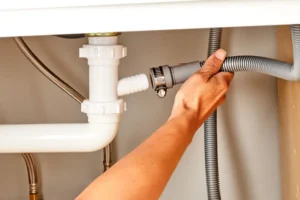
Turn off the water supply
First, find the shut-off valve beneath the sink. Turn it clockwise to stop the water flow to the tap. If you can’t locate a specific shut-off valve for the faucet, turn off the main water supply for your home.
Remember, shutting off the water prevents accidents and makes working on your leaking tap safer. Always make sure there’s no more running water before beginning any repairs.
Disassemble the tap
To disassemble the tap, start by turning off the water supply. Then, use a screwdriver to remove any decorative parts and handles. Next, loosen the bonnet nut that holds the stem in place using an adjustable spanner or a deep socket wrench.
Once done, carefully lift out the entire faucet assembly from the wall or sink.
Remember to lay down towels or cloths to protect your fixtures and catch any small parts that may fall during disassembly.
Once you have everything ready, let’s move on to inspecting and replacing washers or cartridges as needed.
Inspect and replace washers or cartridges
To repair a leaking tap, first turn off the water supply. Then, disassemble the tap carefully using a screwdriver and pliers. Once inside, inspect the washers or cartridges for damage or wear.
Replace them if needed with compatible ones from your washer assortment. Apply plumber’s grease on any new components before reassembling the tap to ensure proper functioning.
If using cartridges instead of washers, visit your local hardware store to find an exact replacement that fits perfectly into your tap’s design without any alterations. Remember to shut off the main water supply before starting this task as safety precaution.
Replace seals and o-rings
Cleaning and replacing cartridges and washers is an essential step in fixing a leaky tap. After that the next step is to replace the o-rings or seals, if required. It involves taking care to remove the old seal or o-ring making sure there’s not any damage to the area around it before putting an entirely new seal in the position.
It is essential to grease the new seal or o-ring prior to putting it back in the proper position. This reduces friction and creates an airtight seal, which will prevent leaks.
If you encounter worn-out or damaged components in your system for taps, fixing these issues promptly will help avoid more damage and expensive repairs later on.
Clean and remove any debris
After disassembling the tap, use a soft brush and white vinegar to clean any debris or mineral buildup. Scrub gently to avoid damaging the inner components. Once cleaned, reassemble the tap following the steps provided.
Moving on to “Reassemble Tap”…
Reassemble the tap
To reassemble the tap, start by placing new washers on the spindle and securing them in place. Then, carefully put back the O-ring and reattach the tap handle. Use a spanner or basin wrench to tighten everything securely.
Once done, turn on the water supply to check for any leaks. If there are no leaks, you’ve successfully fixed your leaking tap! In case of any issues, make sure all components are tightly secured before seeking further assistance.
Moving forward to “Seeking Professional Help for Leaking Tap Repairs,” let’s explore how hiring a professional can be beneficial and what factors to consider when choosing a reputable plumber.
Turn on the water supply
Once you’ve reassembled the tap, turn on the water supply to check for leaks. Slowly open the taps and observe for any drips or leaks from the repaired area. If there are no signs of leaking, you have successfully fixed the tap!
After verifying that there are no leaks, proceed to tighten any loose components as needed before fully resuming use of the tap.
Next up: Seeking Professional Help for Leaking Tap Repairs…
Seeking Professional Help for Leaking Tap Repairs
For those needing assistance with fixing a leaking tap, professional help is the way to go. Understanding the benefits of hiring a reputable plumber and considering cost factors can guide you in making an informed decision.
The Benefits of hiring a professional
A professional for fixing the leaky tap will help you save time and energy. Experts have the knowledge and knowledge to determine the reason for the leak fast and precisely, assuring that it is repaired correctly.
Furthermore, they will provide guidance on how to avoid leaks in the future which could save you money over the long term.
When you employ a professional and you will also gain the access to top-quality equipment and materials. This means that the repair will be durable and dependable. Additionally, professional who are reputable give warranties on their work and give you the peace of mind that if problems do arise after repair and need to be resolved, they’ll be dealt with without expense to the customer.
How to choose a reputable plumber
Choosing a reputable plumber is essential for quality work and peace of mind. Start by checking if the plumber holds a valid licence, ensuring they meet necessary professional standards.
Look for plumbers with insurance to protect your property in case of mishaps during repairs. Consider their experience and expertise, seeking those who have a track record of successful tap repairs.
Ask for referrals or read online reviews to gauge customer satisfaction and reliability. Compare quotes from different plumbers but prioritise skill and reputation over cost alone.
Remember that choosing the right plumber can save you time, money, and stress in the long run – so take your time to find one you trust.
Conclusion
Fixing a leaking tap is simple and can be done with basic tools. By following the step-by-step guide, you can save money and prevent water wastage. If the issue persists or if you’re unsure, seeking professional help is beneficial.
It’s essential to choose a reputable plumber for quality repairs. Remember, regular maintenance can prevent future leaks.